 CyberInstaller
Studio - 51. Step
7: "Font"
  CyberInstaller
Studio - 51. Step
7: "Font"
In this step you can bundle the fonts (fonts) required for the proper display of your application.
Indeed, if this application was going to use fonts that are available on the target system, would replace the missing font with what, according to Windows, as similar, often with disappointing results that should be seriously to undermine the proper display of text using the font missing. enter the font directly in the installation package resolves this issue in its entirety, and the character will be installed only if it exists on the target system, all without restarting Windows.
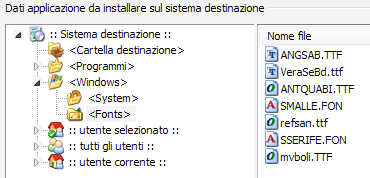
This step is synchronized with the step 4, "Data". A font is essentially a file, thus adding or removing fonts from the package installed by this step, it will automatically sync the files to add/remove the target system through step 4 "Data", the <windows>\<Fonts>.
 CyberInstaller
Studio - 51. Step
7: "Font" - General Operation and use interface

List installed fonts in the current system. A font to be working (usable from any application) must be installed manually or via the Windows Control Panel or via automatic installer. This installs all the fonts will appear in this list, ready to be included in the installation package.
Add - [buttons]
Adds the font(s) selected in the installation package.
This item is synchronized with the step 4, "Data", automatically adds the file-system fonts on your destination from <windows>\<Fonts>.
Note:
It's possible also use the right mouse button on the selected font and use
the pop-up menu that appears.
Font List to be included in the package
List of fonts added to the package.
 Delete -
[buttons]
Removed from the
package the selected font(s).
This item is
synchronized with the step 4, "Data",
automatically removing the file-system fonts on your destination from
<windows>\<Fonts>.
Note:
It's possible also use the right mouse button on the selected font and use
the pop-up menu that appears.
Clear - [buttons]
Delete all fonts added to the package.
This item is synchronized with the step 4, "Data", automatically removing the file-system fonts on your destination from <windows>\<Fonts>.
Note:
It's possible also use the right mouse button on the selected font and
use the pop-up menu that appears.
 See
also ...